
Short answer: Yes. Lush Henna makes your hair darker and covers grey hair, but there is a right way to do it. Here’s what you need to know.
As someone with naturally very dark hair who was blessed with varying amounts of grey hair from the age of 24, covering it up has been on my mind for a while, but I didn’t know how to do it without causing damage.
My hair hates chemicals. And I mean, hates chemicals.
Having used a vast array of chemical dyes over the years (red, black, bleach, blue – you name it) and it turning in to a matted and unhealthy disaster almost every time, I wasn’t sure if it was possible to colour my long mop of curly hair without destroying it.
Then I found out about henna.
In my mind, henna was red. It’s a plant and it is red in its natural form, but the world of henna hair dye has evolved to include other plants that can make your hair dark, such as indigo which supposedly does just that.
I was skeptical. I did not want red hair. But after reading a range of reviews and asking the people at Lush, I realised it was probably possible to use henna without looking like an apple, and decided to give it a shot. Here’s what happened.


How to cover grey hair with henna
The first thing you need to do is clear a whole day – this is a slow process and you will need time.
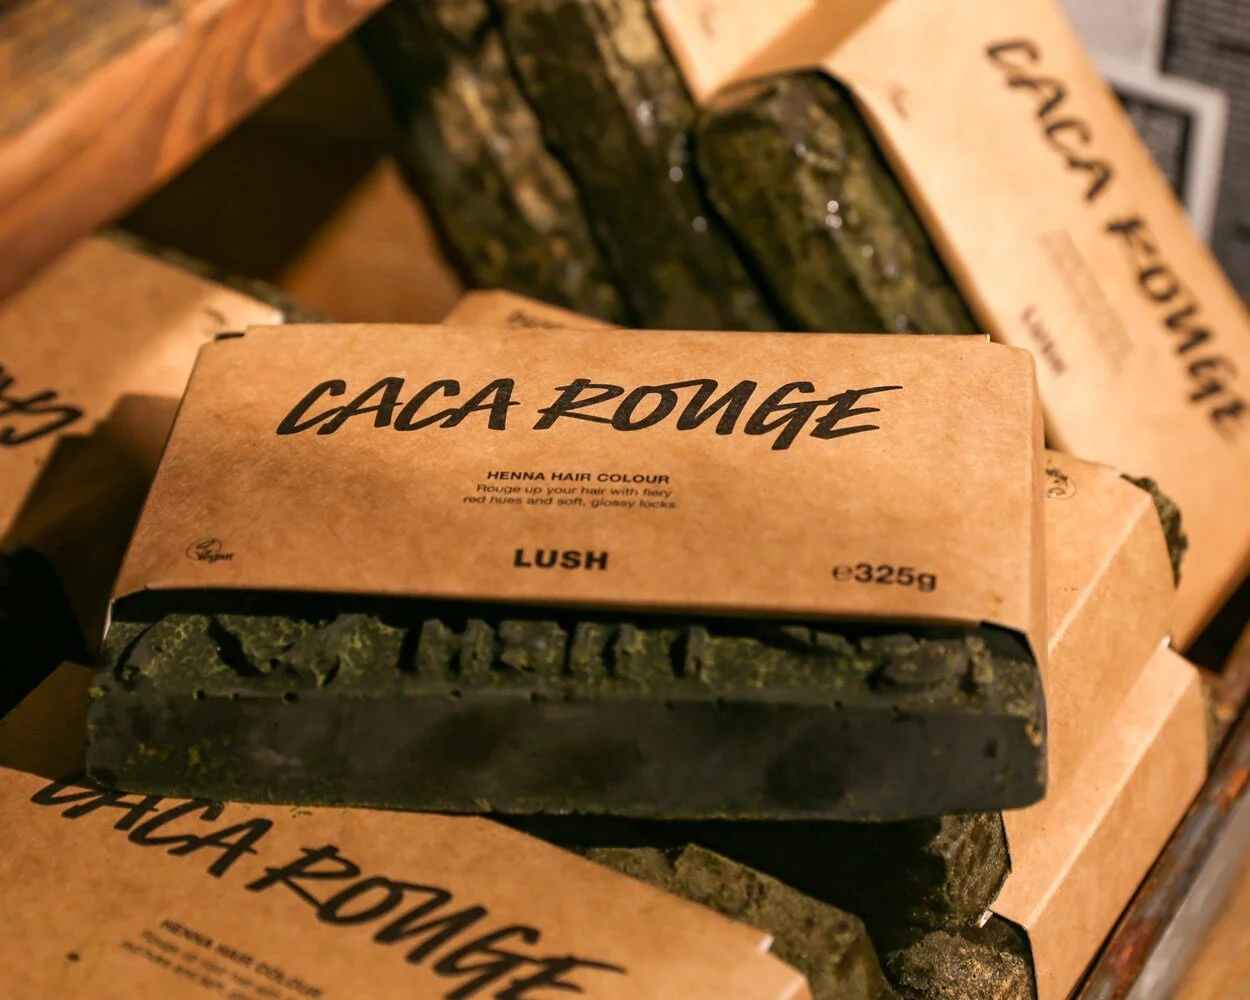
Lush henna comes in big blocks. The number of blocks and colours you need will depending on what colour you’re going for. But either way, if you’re trying to cover greys, you will need to start with a big block of red.
As with regular chemical hair dye, it’s difficult to get black to take to blonde, grey, or white hair – it needs a bit of red in it for the dye to work. It’s the same with henna.
If your hair is predominately your natural colour with greys here and there and you try to use a darker henna without using red first, the greys will be very highlighted, especially if you go straight for black. It kind of defeats the purpose, so best to get it red first.
Depending on the colour you want, prepare to get a few different blocks.
For red hair: Caca Rouge
For brown or chestnut hair: Caca Rouge and Caca Brun
For very dark brown hair: Caca Rouge, Caca Brun, and Caca Noir
For black hair: Caca Rogue and Caca Noir
Since my hair is dark brown and I want to keep it that way, I went with option three and got three blocks.
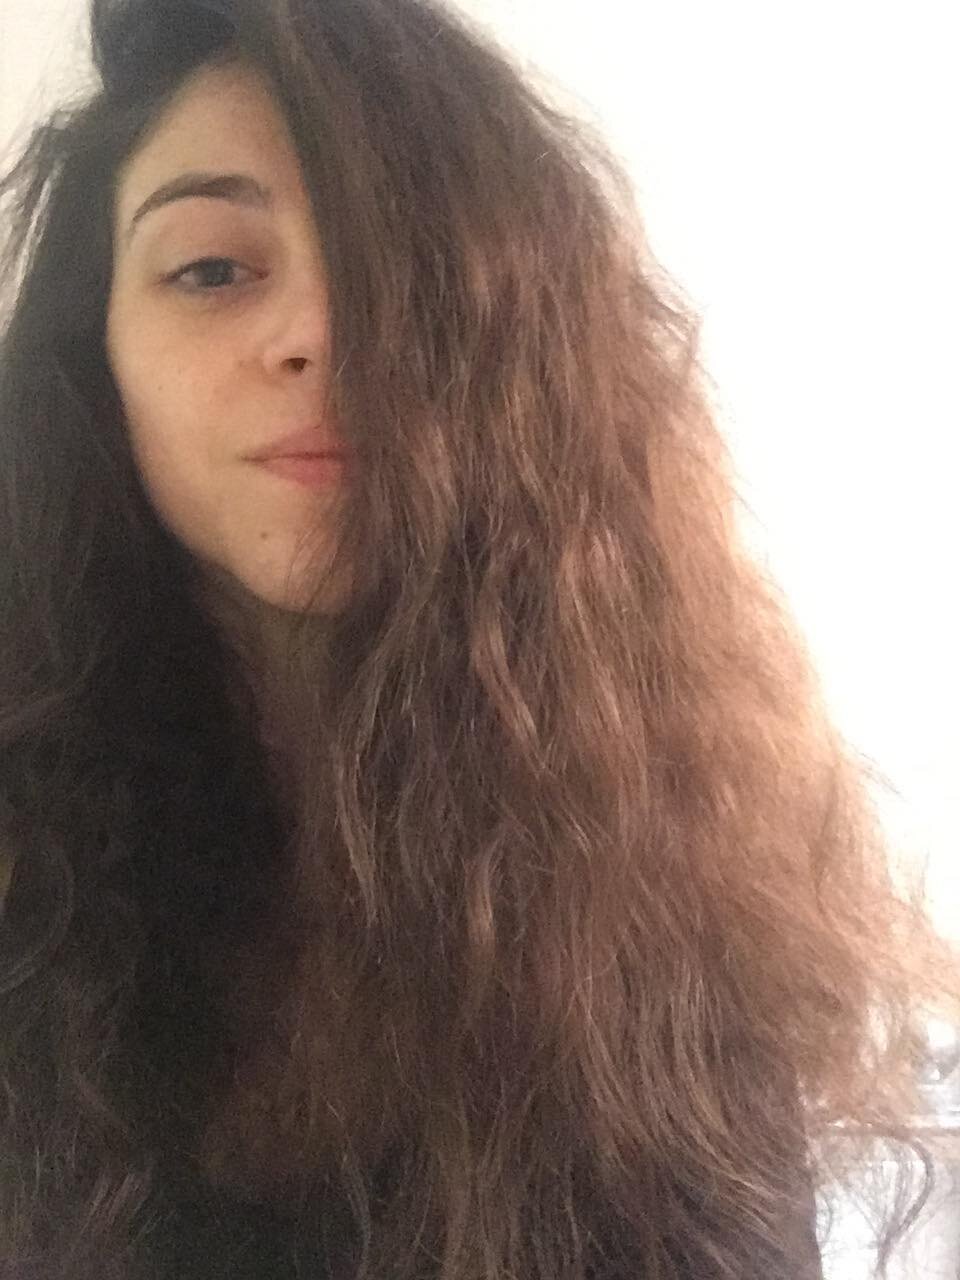
before
The amount you need really depends on the thickness of your hair. The longest pieces of my hair stretches to the small of my back, and I have a lot of hair, but it isn’t thick so I found about 80% of a block was enough. If you’re unsure, opt for more instead of less. If it’s too much, use less next time.
To make sure your skin is protected and you don’t end up looking like an orange, put on clothes you don’t care about and douse exposed skin in some kind of balm. I used pawpaw ointment because that’s what I had on-hand, but Vaseline or some kind of petroleum jelly will do fine.
Put it all over your face and neck, any parts of your chest, shoulders, arms, legs, and feet left exposed – henna goes everywhere. Line the floor and the sink and any surfaces you’re using with cardboard or plastic, and have rubber gloves ready. It’s messy stuff.
Preparation
Start with red.
Some websites will tell you to chop the block as finely as possible before whacking it in a bowl, but that’s unnecessary – it melts down.
I chopped it until each piece was roughly the size of a chocolate square and put it in a bowl over a saucepan of simmering water. Add boiling water from a kettle gradually, stirring, until the henna reaches the consistency of pancake batter, not crepe batter. It should slowly run off a spoon on its own, but not too easily. If it’s really thick and gloopy, it’ll be hard to run through your hair.
It takes a bit to melt, so I used a whisk in the end to make sure all the chunks were gone.
Once you’re done melting it, keep it over the saucepan of hot water and take it to your workstation.

Application
Apply it on clean, dry, brushed hair.
A dye brush would probably be easier, I used my hands and it was fine, but I will say having something to divide your hair in to sections is definitely worthwhile. I used the pointy end of a make up brush, but you could use the pointy end of a comb.
Starting in the middle, take a section of hair and start applying henna to the roots. I found it easier to do the roots first because it means wet pieces aren’t hanging over your face as you try and divide and colour each section. And the henna is heavy, so it is an effort to flick between dry hair and henna-covered hair. Doing the roots first is much easier.
The back is a little tricky, so I covered my hands in the stuff and rubbed it on to the back of my scalp like I would with shampoo. When I felt sure that was all coated, I started on the length.
When you have long hair like I do, it can take a while to ensure every strand is covered because the henna is so thick and gritty. I spent time pulling chunks of my hair apart and rubbing more of the stuff in. When I thought it was all coated, I put more through the roots and the ends to make sure.
When you feel like it’s done, your hair should look all thick and ropey - like Tarzan’s hair.
Lift it up and twist it in to a high bun on top of your head. Smooth it down and it’ll stay there on its own.
For henna to develop red, it needs heat. I tied a bag over my hair and left it for two hours to keep the heat in.
Washing it out
Getting this stuff out is an effort. Don’t bother trying to do it in the sink, you will need to have a full shower. And your shower will end up looking like a kid ran through new turf with a sprinkler.
Rinse and rinse until the water runs clear. Put some non-silicone conditioner in, rope it through, and rinse again until there’s no grit left.
Dry it as you normally would.
If you’re going for red and the greys are lighter than the rest and you hate it, you can always go over those bits again. The great thing about henna is you can go over it as many times as you like without damaging your hair, so go for it!
Brun and Noir Application
When your hair is totally dry, prepare the henna exactly as you did with the red.
Douse yourself in petroleum jelly again, make sure surfaces are covered, and chop the blocks.
I wanted dark hair, so I used 50:50 Brun and Noir. It was pretty dark, so I’d probably go for 60:40 next time.
Mix them together over the saucepan and start the process again.
The only real difference here is the developing time. Dark henna needs time to develop. At least four hours, in fact.
It’ a little difficult because the henna is heavy on your head after all that time and you can’t rest your head on anything, so be warned.
Since you shouldn’t cover this one with a bag unless you want to bring out the red tones, you’ll need to make sure you’re sitting somewhere without carpet – pieces will crumble and fall during those four hours, and you don’t want it staining anything.
You also want it to dry hard on your head, and a bag would slow the process down.
Once you’ve made it through four hours, you’ll be pretty keen to get it out.
Some people say not to use shampoo for a few days after you rinse henna out, but Lush henna is infused with shea butter, which is super moisturising so it’s handy to know how your hair reacts to shea butter beforehand.
Since my hair is fine, it ends up looking and feeling like I dipped it in a bowl of grease when I use shea butter, so I shampooed my scalp.
If you’re only rinsing it, make sure you take the time to get all the product off your scalp – the grit will stick around otherwise and it will look and feel weird, and probably stain your bed sheets.
I then ran conditioner through it to smooth it out, and dried it as normal.
The result
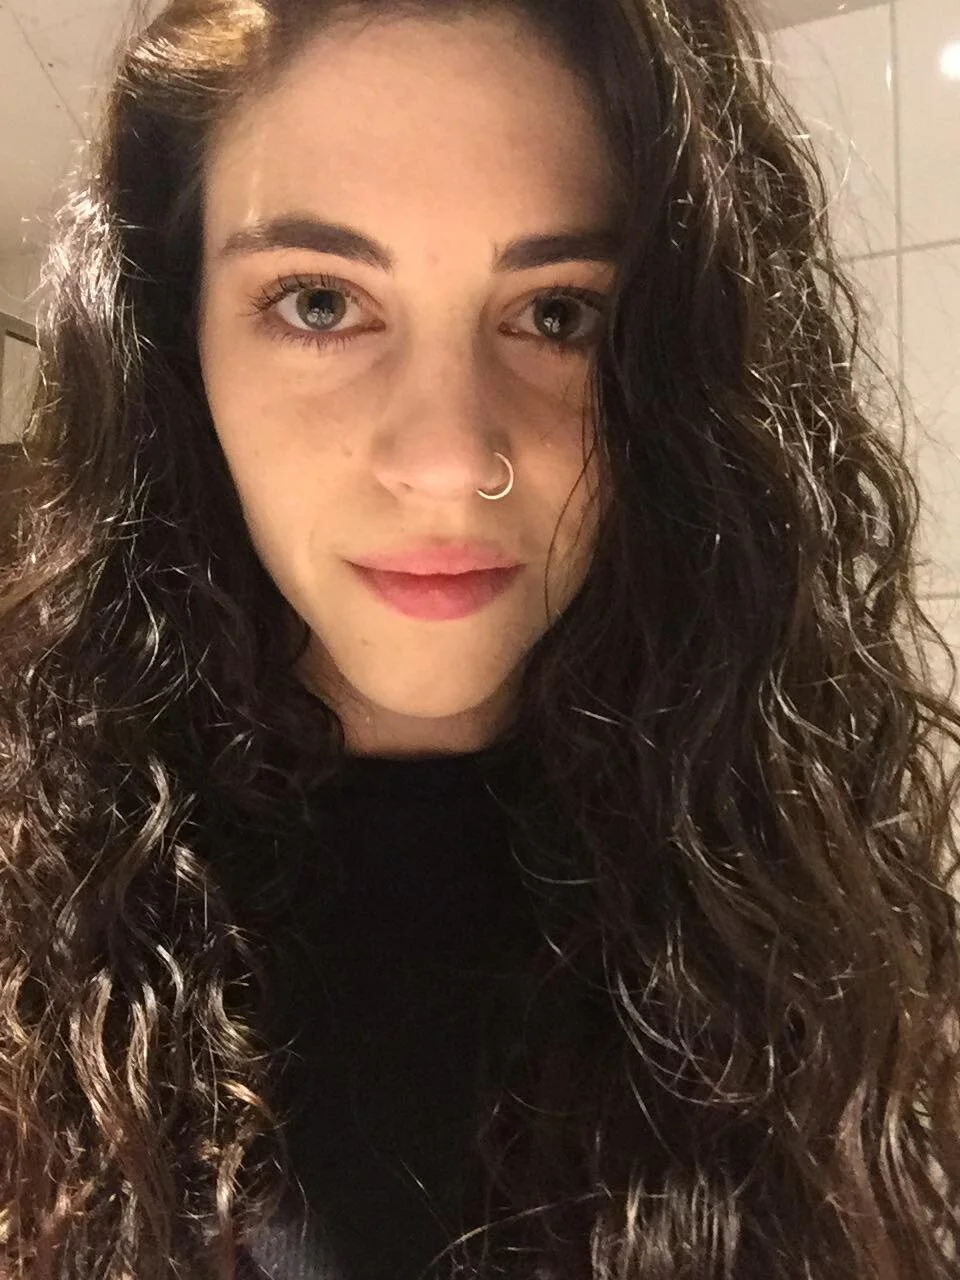
I noticed a difference immediately. My hair was dark like I wanted, and greys were more or less covered. The down side is that they were lighter than the rest - coppery - but it didn’t really look like I’d dyed grey hair – they just looked like vague natural highlight.
My hair felt thicker, fuller, and healthier. I have fewer knots, it’s conditioned, and the henna doesn’t seem to be fading.
In fact, it takes a few days for henna to fully develop, so if your greys are lighter than you want, wait a couple of days before going over it again.
I wasn’t 100% in love with the colour at first, but it beats chemically damaged hair by 1000%
Pictured below are a before and after - you can definitely tell my hair is darker on the right.
Verdict
While extremely time-consuming, I would use Lush henna again.
Henna is one of the most permanent dyes you can get, so you’d only theoretically need to dye the roots every month or so. That’s what I plan to do, which automatically takes a lot of the time out of the equation.
While each block does cost around $25, if you’re only dying the roots every month, one block will go a long way, so it’s not too pricey when you look at it that way.
Things to note
While hair dye is essentially not natural, henna is different to regular dye. Where chemical dyes break down the structure of the hair and inject it with colour, henna acts as a varnish and coats the hair while maintaining structural integrity. When you have fine hair like me, that makes a huge difference. But even if you have thicker hair, chemical dyes will break your hair down over years of use, so it’s worth considering no matter what your hair type is.
The other thing is that once you use henna, you won’t be able to use any regular hair dye with bleach in it. The chemicals do not react well and your hair could break off, so make sure this is what you want.
